FanTestic Part 1: Install and Single Point Test – New
Part 1 of our FanTestic Training series. This covers installing and using the software for a single point test. It’s as easy as inputting your data. The software will automatically…
Part 1 of our FanTestic Training series. This covers installing and using the software for a single point test. It’s as easy as inputting your data. The software will automatically…
Part 8 of our FanTestic series covers the first half of an auto-test. Watch it, and then part 2 to see how the test can make life easier for air-tightness…
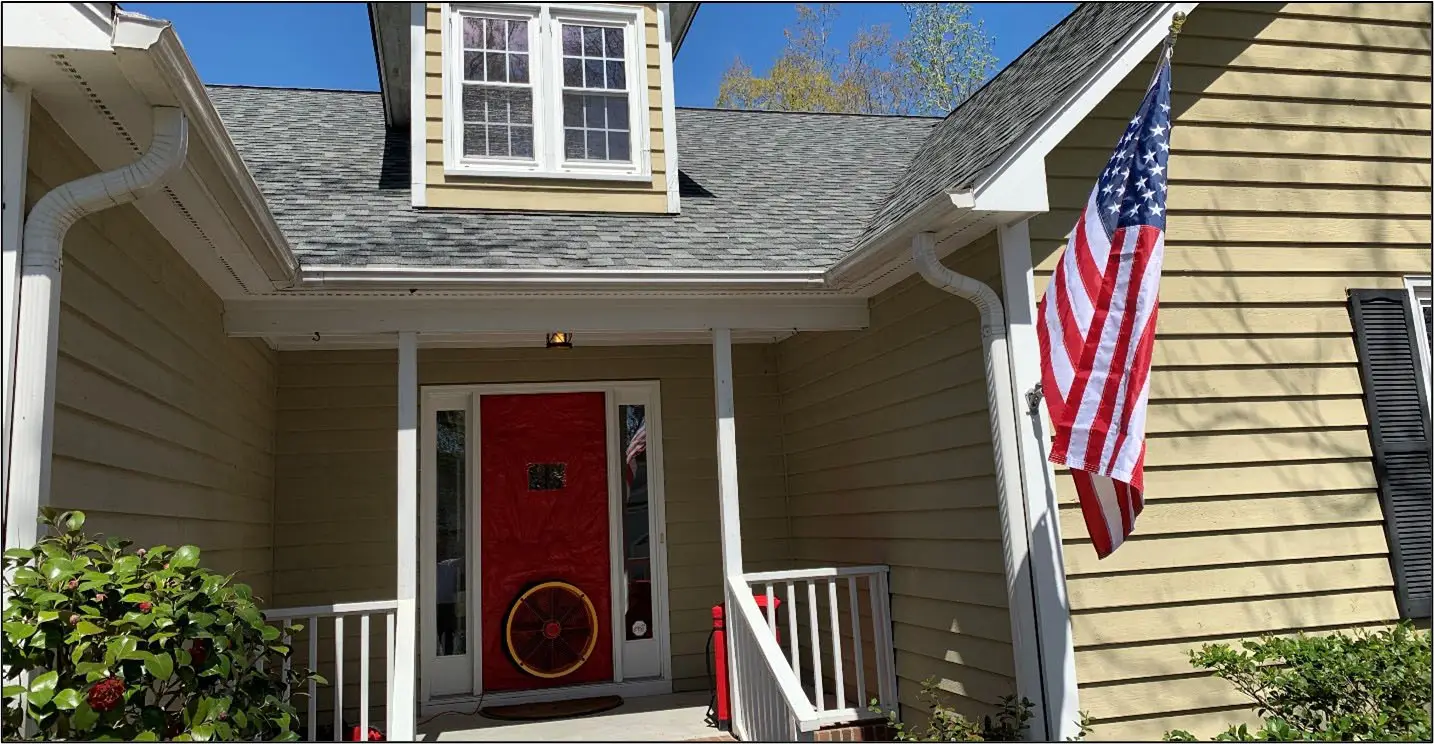
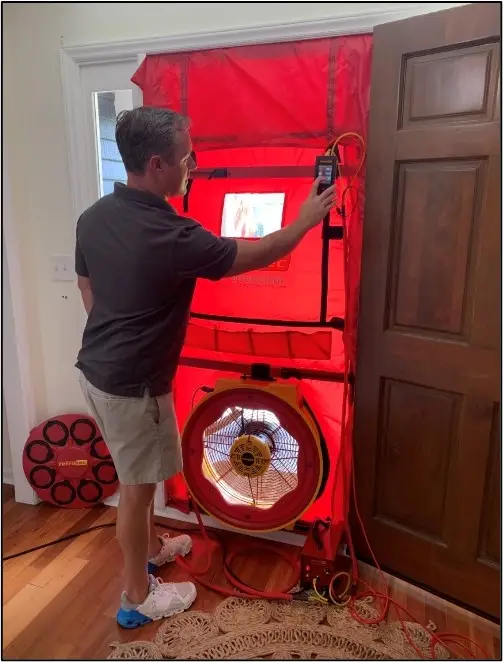
Test Set-up Equipment Used: A Retrotec blower door system is installed in an exterior door frame. Preparation: All exterior doors and windows are closed, and all interior doors are opened…
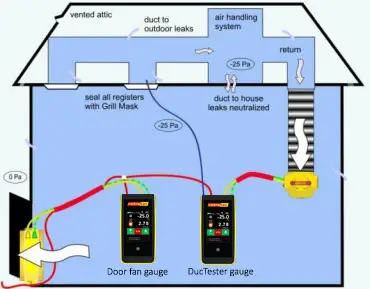
This five part series looks what an air leakage test of a typical house might look at. In this part, we take a look at a duct leakage to outdoors…
This five part series looks what an air leakage test of a typical house might look at. In this part, we discuss how to setup for a house test. It’s…
This five part series looks what an air leakage test of a typical house might look at. In this part, we look at what you can see once the door…
Test Overview Fan and Flange SetupA Retrotec DucTester fan is connected to the return grille via a clip-on flange and flexible ductwork. The filter is removed, and all supply, return,…
Part 7 of our FanTestic series covers how to adjust the settings to prepare for an auto-test. https://youtu.be/7HrlE1jlgNE Part 7 in Retrotec’s FanTestic software series dives into the crucial setup of…
Part 6 Is a brief video that explains the importance of setting up correctly for an auto-test. https://youtu.be/UR7x90isPqI Essential Pre-Auto-Test Steps Equipment & Calibration Check Confirm all instruments—blower fan, manometers,…
Part 9 of our FanTestic series is the final video, and covers the second half of an auto-test. Learn how FanTestic software can make life easier for air-tightness professionals. https://youtu.be/WbXlif82Y-k…