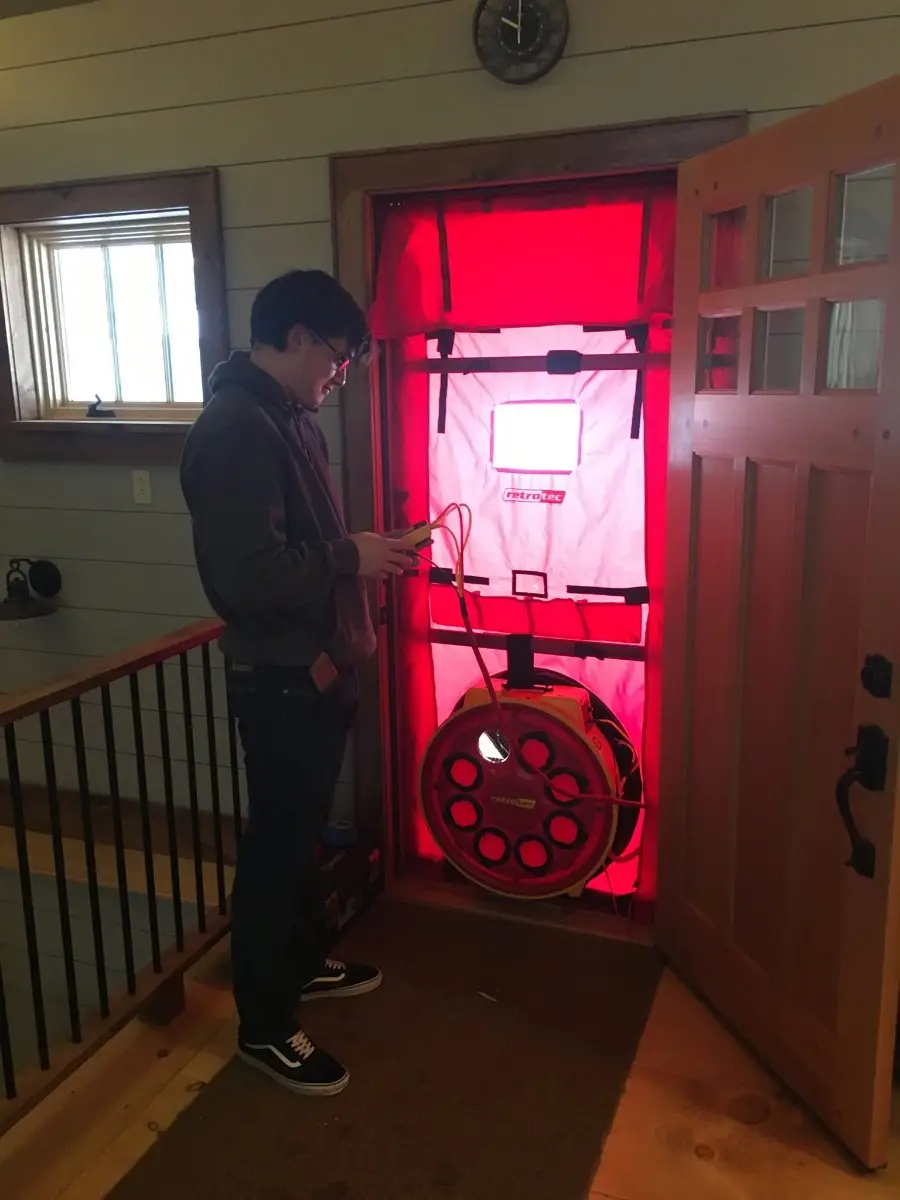
Test Overview
Fan and Flange Setup
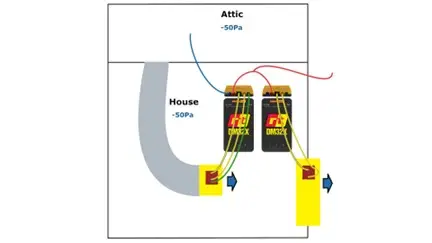
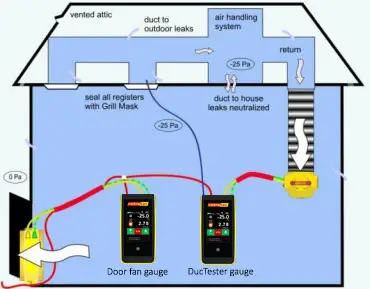
A Retrotec DucTester fan is connected to the return grille via a clip-on flange and flexible ductwork. The filter is removed, and all supply, return, and fresh-air vents are taped shut. A slight outdoor pressure reference is established by leaving a door or window openPressure Tapping
A reference tube is inserted into the supply register closest to the air handler. This connects directly to the digital gauge to measure pressure inside the duct relative to the home’s interior.Depressurizing the System
The ducts are typically depressurized (negative 25 Pa) to pull tape tighter against registers and minimize leakage, though some protocols allow pressurization.Recording Leakage Values
Once stable, the gauge measures airflow (usually in CFM) escaping from the ducts. This figure represents the total duct leakage—a key metric for HVAC performance.Locating Leaks (Optional)
The test may be followed by smoke-assisted leak detection or pressure pan testing to identify specific leaks at registers or joints.
Why it Matters
Improved energy efficiency: Reducing duct leakage ensures conditioned air goes where it’s needed—not outdoors or into unconditioned spaces.
Performance validation: Many energy codes and rating systems (e.g., RESNET HERS) require duct leakage testing.
Diagnostic capability: Including both inside and outside leakage gives a complete picture of duct tightness and helps target remediation.
Pro Tips
Use a straight run of flex duct between fan and return to ensure accurate airflow readings.
Keep all vents sealed tightly—any open register can skew results.
Opt for depressurization to help seals tighten against duct edges.