Seal & Secure the Duct System
Seal all supply and return registers—including exterior inlets—using grill mask tape to prevent air bypass.
Keep interior doors open to allow duct pressure to stabilize across the home.
Shut off HVAC systems: shut down air handlers, furnaces, air conditioning, exhaust fans, dryers, and combustion appliances.
Connect the DucTester to the Duct System
Ensure the air-handler is turned off and remove its filter.
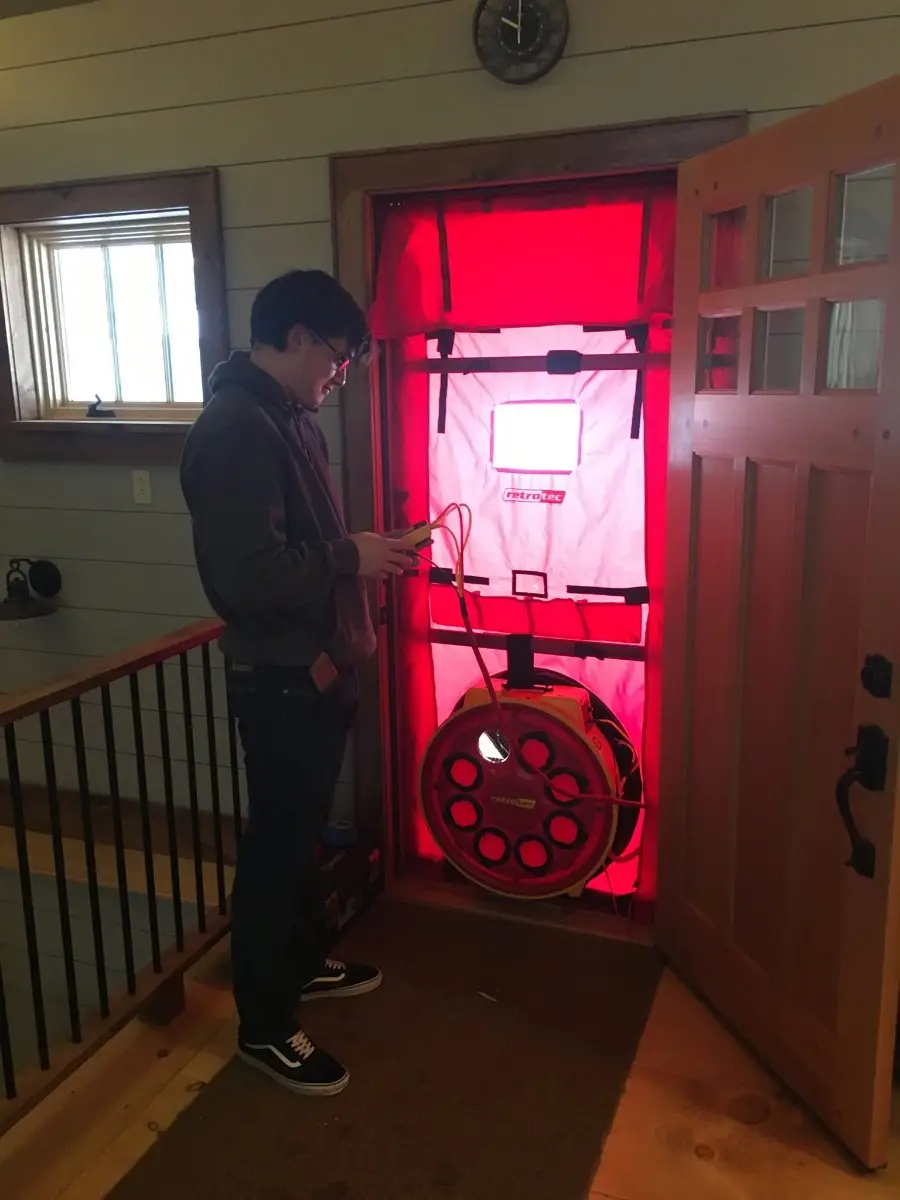
Tape the duct tester flange to the main return duct or air-handler access panel using high-quality tape.
Attach the flex duct to the flange.
Install a Mid-range plate to start—adequate for most residential duct systems.
Set the gauge to match: Device = Retrotec DU200, Range = Mid.
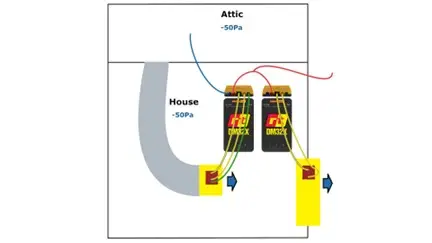
Configure House Setup for Testing
Outside openings: open one exterior door or window slightly—this allows air to enter or exit during the test.
House pressure reference: connect the gauge’s static-pressure tube (often red/blue) to a central location.
Confirm no unintended airflow from appliances or open vents that could distort the test.
Why These Steps Matter
Accurate readings: Sealing all registers ensures test airflow only passes through the DucTester.
Stable pressure conditions: Open interior doors and controlled exterior ventilation help stabilize duct pressure.
Repeatability: Consistent setup improves comparability across multiple tests or homes.
Quick Setup Checklist
- HVAC and appliances off; filters removed
- All registers sealed
- Door/windows setup for proper pressure stabilization
- DucTester flange attached and flex duct connected
- Mid-range plate installed; gauge set to DU200 + Mid range