


Learn how to input data into FanTestic software from a manual blower door test. Also, get tips and information on best practices.
Open File → New test and select your protocol (e.g., ASTM, ATTMA, EN13829).
Verify test standard in Tools → Options, as it sets the calculation framework for later steps
Choose your fan model and serial number; click the wrench icon to input calibration coefficients (N & K values).
Do the same for your gauge—select its serial, add range-specific correction factors.
Fill in envelope area, floor area, and building height above ground.
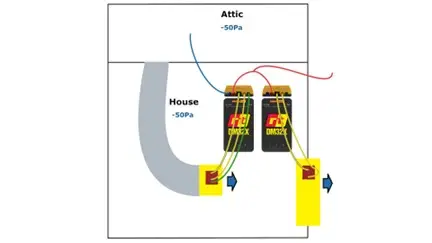
Enter environmental factors: baseline (bias) pressure, temperatures, barometric pressure, wind speed/direction, and operator location
In the Data Sets section, choose Enter Data Manually = Yes to unlock input fields.
For each pressure point:
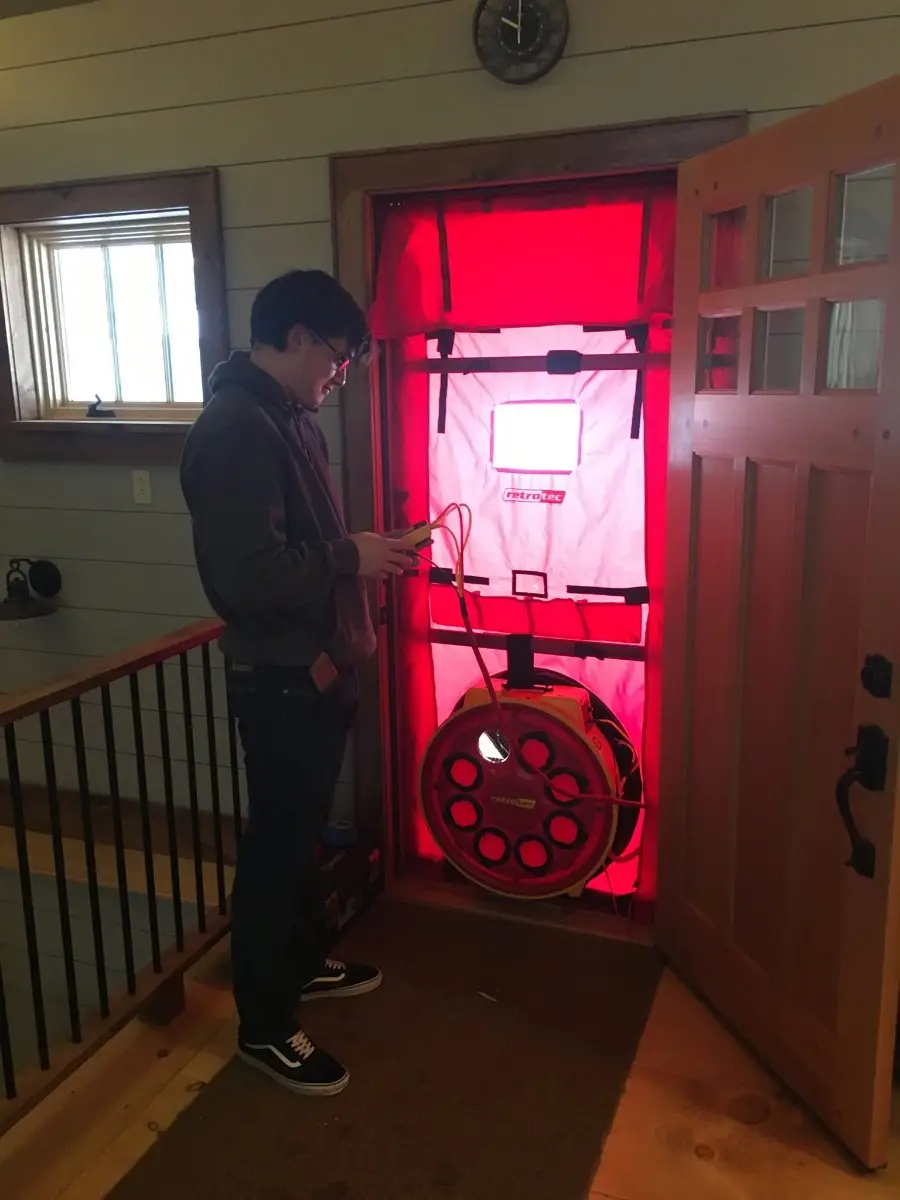
Stabilize the system (20–40 s averaging recommended when windy).
Use gauge HOLD to freeze readings for recording.
Input induced pressure (Pa) and corresponding airflow (CFM).
Add baseline/final bias readings before and after test points
Once all fields are green, click Calculate. FanTestic will generate leakage curves, ACH50, ELA, and report deviations from standard compliance.
You can run multiple Data Sets—like pressurization + depressurization—or compare pre- and post-seal results
Save your test file via File → Save As.
Generate Word reports or export raw data to Excel for further analysis
Time Averaging: Use at least 20 s for pressure/flow readings and 5 s for baseline/bias readings when manually entering data.
Gauge HOLD: Always freeze the readings before logging data to ensure accuracy.
Accurate Calibration: Enter fan and gauge corrections early to ensure flow is computed correctly.
Multiple Sets: Capture test points in both pressurization and depressurization for balanced results.