How to run an automatic blower door test using FanTestic software.
Getting Started
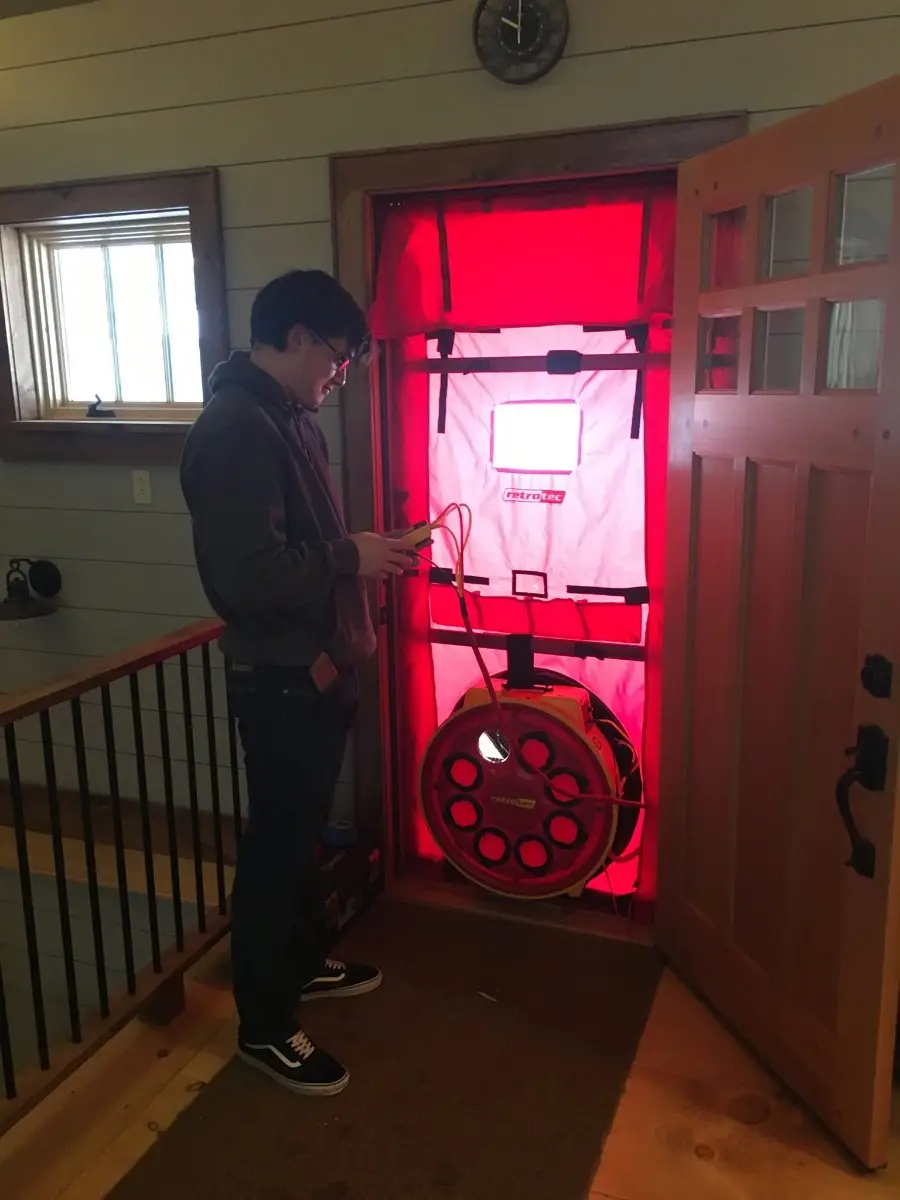
Connect Your Equipment
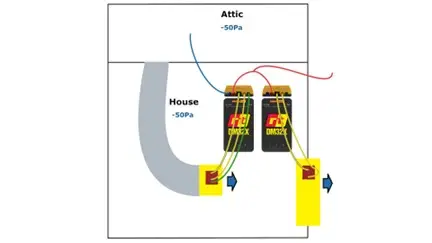
Ensure your Retrotec digital manometer (DM‑2 or DM‑32) and blower door fan are set up properly and recognized by FanTestic.
Confirm your test standard (ASTM, ATTMA, CGSB, EN13829, USACE, etc.) is selected in the settings.Open Auto-Test Mode
Launch FanTestic and click the Auto-Test button to enter fully automated mode. The software will prepare a sequence of pressure targets (e.g., 50 Pa, 25 Pa, 10 Pa).
During the Test
Automatic Fan Control: FanTestic adjusts the fan to reach and maintain each target pressure.
Stabilization Logic: The software waits until readings stabilize—based on your defined criteria—before logging data.
Real-Time Monitoring: You can watch live graphs of pressure vs. airflow, and FanTestic handles transitions between points without manual input
Data Capture and Reporting
Continuous Data Logging: Each steady-state pressure point is captured automatically.
Graph & Report Auto-Generation: Pressure-flow curves are plotted in real-time, and full reports—including results and calculations—are generated in Microsoft Word. Exporting raw data to Excel is also possible
Why Use Auto-Test
Consistency & Compliance: Automated cycling through test points ensures uniform methodology across runs.
Efficiency: Spend less time adjusting and more time addressing field priorities.
Professional Feedback: Live readouts and automated reports enhance transparency for clients or regulators.
Pro Tips
Customize Stabilization Settings: Adjust hold times and variance thresholds in advanced settings for faster or more precise results.
Start with Continuous Mode: Begin in continuous pressure mode, then let Auto-Test run the sequence for seamless data capture.
Save & Reuse Profiles: Store auto-test configurations (pressure points, standards, tolerances) for future use.